Leah Potter shares an anterior restoration case in which communication, precise shade matching and complex characterisation were all key to keeping the patient satisfied
Case overview – Written by Leah Potter
Anterior restorations can be challenging to get right at the best of times, but what happens when two completely different appliances are required, in two different materials and different shades? This combination is exactly what was needed for this case.
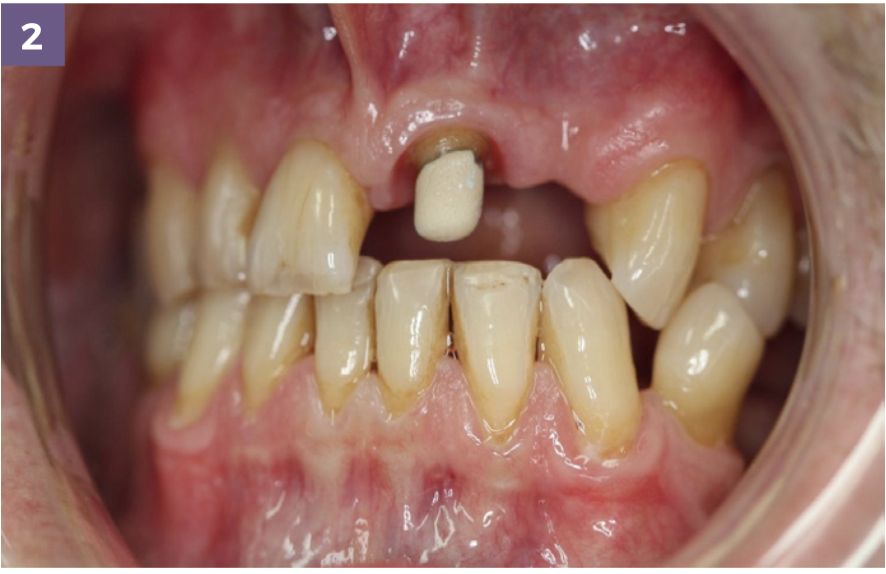
The patient presented with a partial denture in replacement of a lateral that had been extracted ready for a Maryland bridge and a central tooth that required a new crown. The clinician sent the patient to the lab for personalised shade matching. When taking the first look at the natural dentition, I was immediately excited to take on this case, due to the range of colours and textures existing in the mouth.
The patient wore a bright temporary crown on the central and mentioned he was interested in whitening in the future as he liked the shade of the temporary a lot. The temporary crown was matched to an A2, whereas the lateral needed to blend into the canine, so a shade A3 with a B4 neck was chosen (Figures 1 to 3). With the possibility of whitening in the future and the patient loving the shade of the temporary crown, there was an element of the unknown…
Staining, varying translucency and crack lines were all present features on the existing teeth, which the patient wanted to incorporate, but not too much in case he did decide to proceed with whitening.
I was so honoured to be able to take this shade myself as personalisation was key here, and I couldn’t wait to get started.
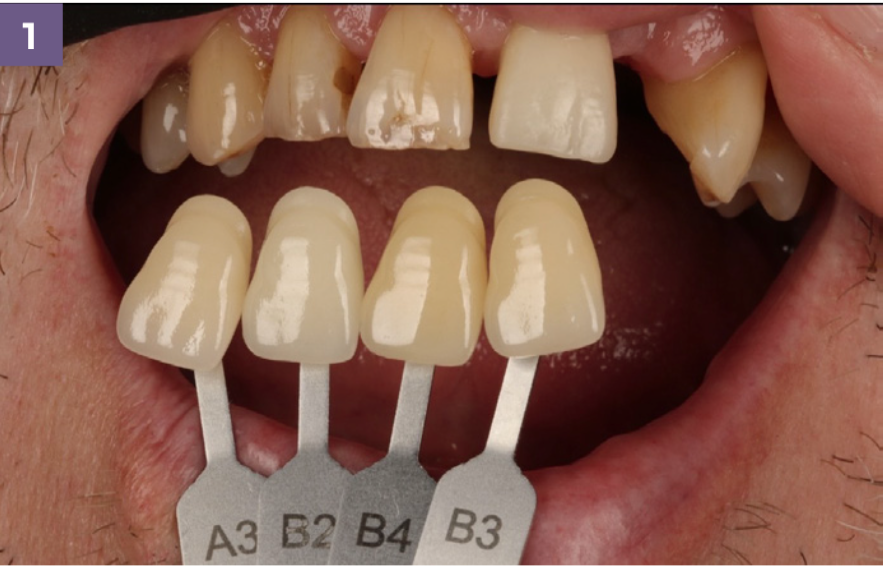
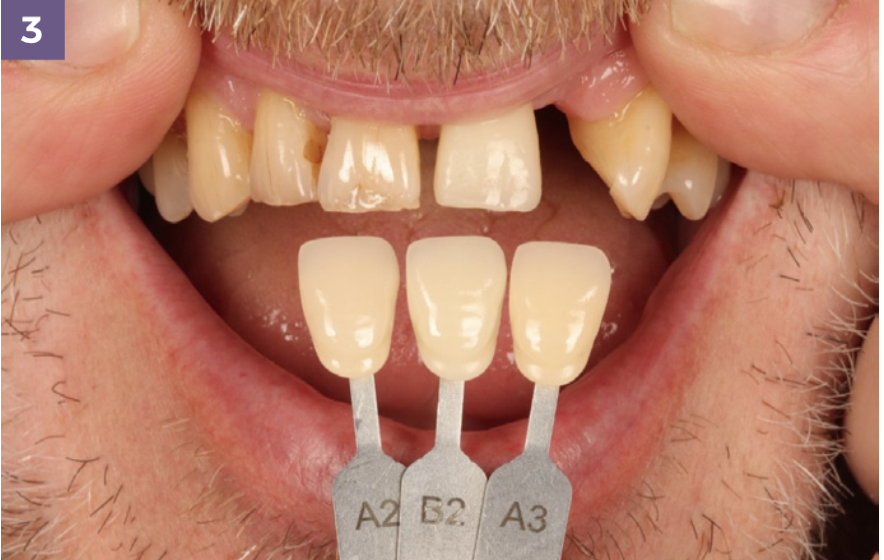
Figures 1 to 3: I was initially drawn towards shade A3 for the central because the patient’s natural teeth had bright undertones with some staining around the neck and an abundance of character. However, the possibility of future whitening had to be kept in mind. Naturally, the canine was darker than the central, so I thought choosing two different shades would create a nice transition.
Technical work
The materials were already chosen by the clinician: Luxor Z True Nature zirconia with an opaqued fit surface and a porcelain fused to metal bridge using the Noritake EX-3 range. I wasn’t too concerned with the difference in materials due to the beautifully high aesthetics that the zirconia alone holds now.
Regarding the design, the patient wanted the most natural outcome, so the crown was designed almost identically to the adjacent. The metal work was designed with a wing on the canine with the pontic placed further back to ensure plenty of space to add all the characteristics in porcelain. The crown was designed with all the texture included so the chance of getting a highly natural-looking crown was achievable before I even got my hands on it. The diastema had to stay, but luckily the patient was keen on keeping it anyway.
I fitted the zirconia to the model and left it until the bridge was layered (Figure 4) as I wanted to make sure the staining matched correctly. After degassing and opaquing the metal work in a shade A2, I began layering the ceramics. I started with the basics – a thin layer of opacious body and the bulk of it in an A3 dentine. I decided that many of the characteristics should be added in porcelain rather than staining because the natural teeth had deep crack lines and strong translucencies.
I cut the dentine layer back to add white porcelain in the form of very thin crack lines and placed more dentine on top so the cracks would look deep and natural. I started adding a thin layer of enamel and added blue and grey porcelain delicately to the incisal edges, before finishing the final shape with the enamel (Figure 5). Before baking, I also chose to add a thin halo on the very edge with creamy enamel.
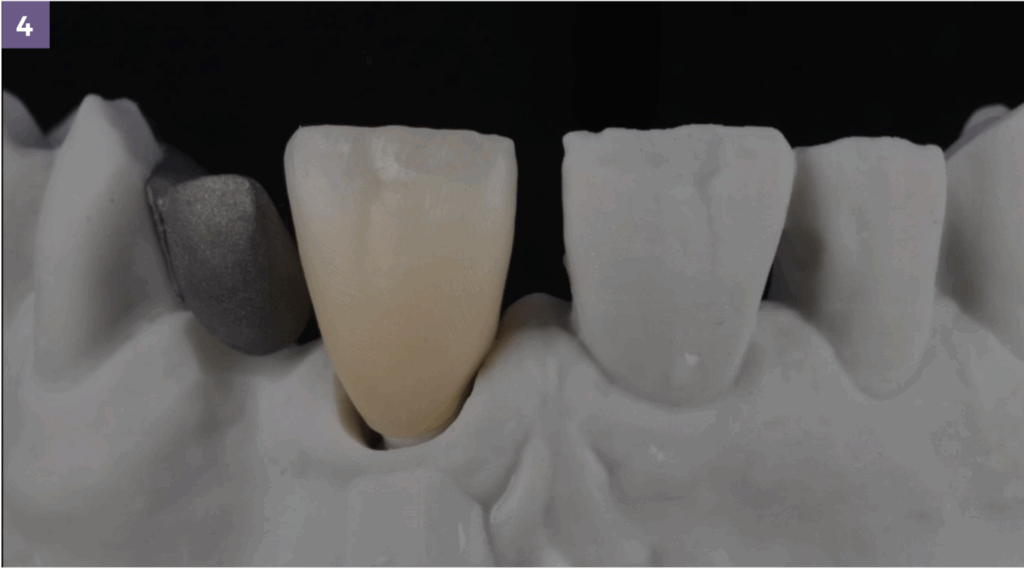
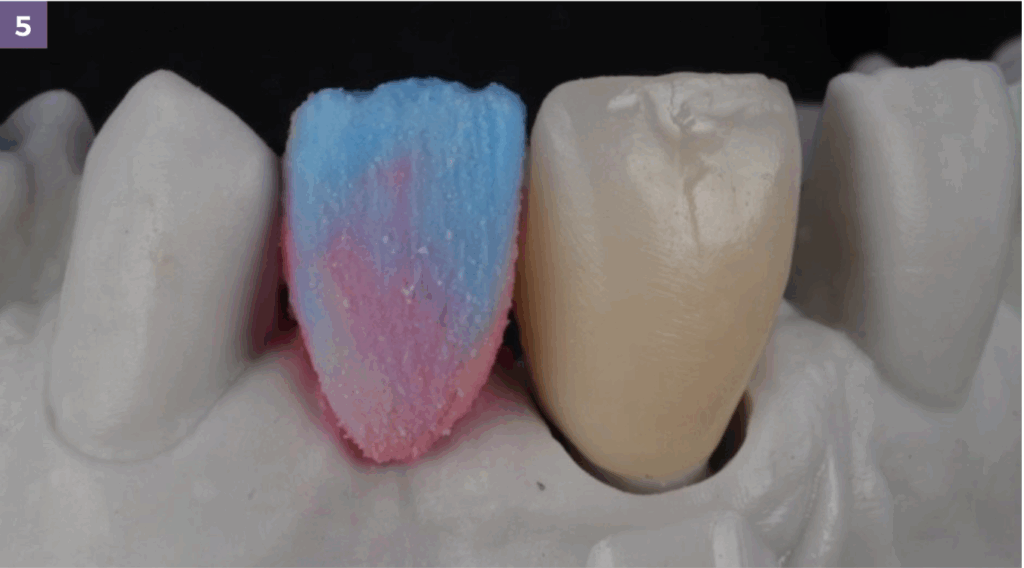
Figures 4 and 5: I decided to fit the zirconia but did not stain it until the ceramic was built so that I could make sure I got all of the detail right. I used porcelain stains to clearly define where each different layer was placed.
The porcelain bridge was almost where I needed it to be after the first firing in the furnace, aside from a few areas on the incisal edge that needed more length after shrinking back slightly. I usually add a layer of lustre on the second firing, but I didn’t on this case because I was waiting to see how the teeth would look with just staining on top of the effects I had already added. I cooled the bridge for a long time and prepared it for staining by using a few different diamond burs to add texture and shape. I mainly used my tapered diamond to add some light definition from the incisal edge upwards and roughness up to the neck, followed with my light silicone rubber to smooth slightly.
This case reminded me of the importance of communicating with the patient thoroughly before starting the case.
Adding character
Regarding characterisation, I used the Miyo system following a colour map I’d made for myself using the patient’s photos on an iPad. I’m usually opposed to using the iPad and like to draw my colour maps by hand with pencils but doing it this way gave me the ability to zoom in on the photos and really see the intricate detail within them (Figure 6). I used many different colours in this case, from oranges and browns on the necks down to yellows, blues, whites, greys and even black on the incisal. The hardest part about staining these teeth was knowing that the patient required the teeth to be slightly lighter than the natural dentition and trying to find that balance.
I decided that many of the characteristics should be added in porcelain rather than staining because the natural teeth had deep crack lines and strong translucencies.
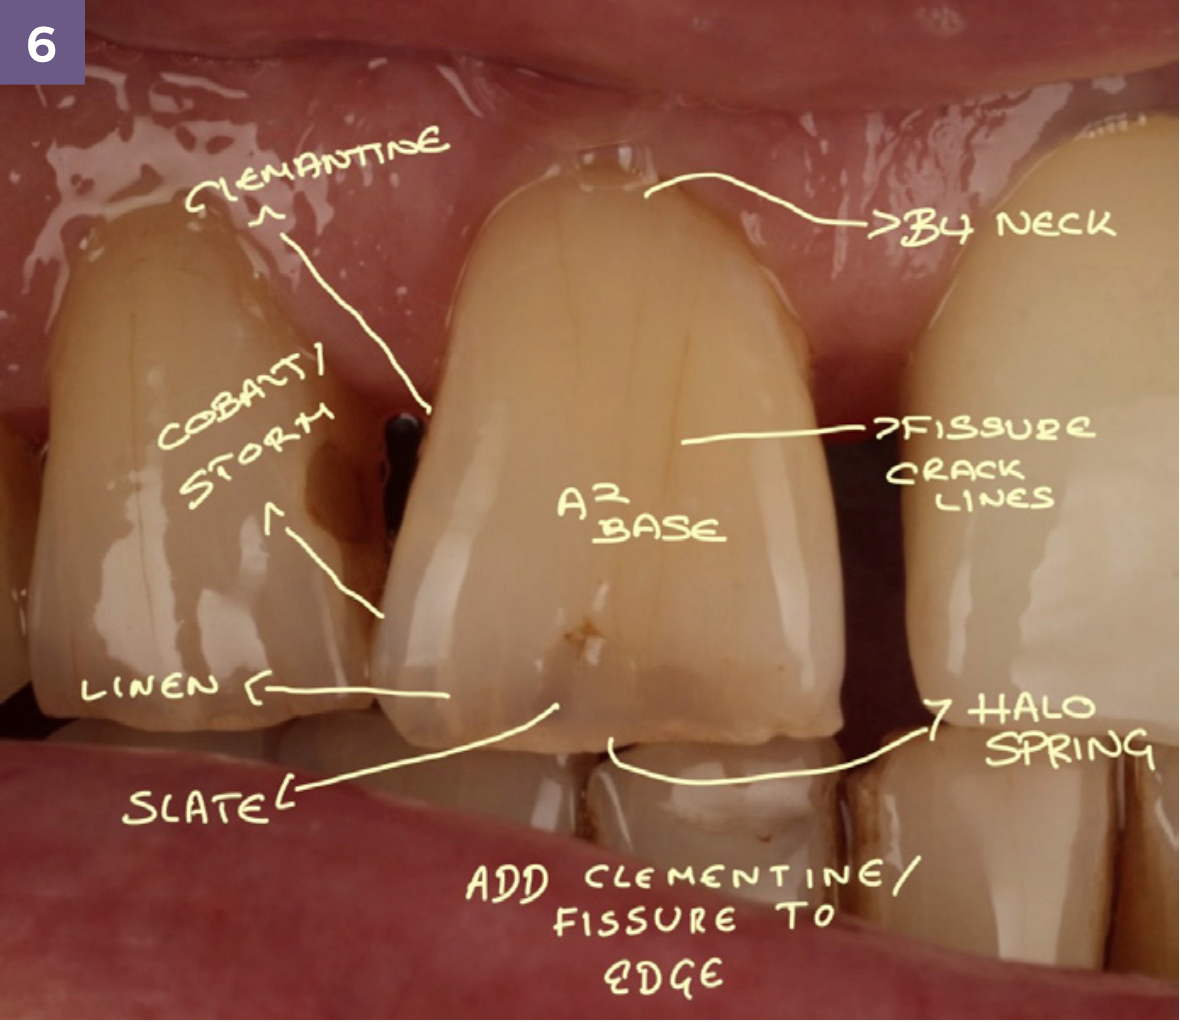
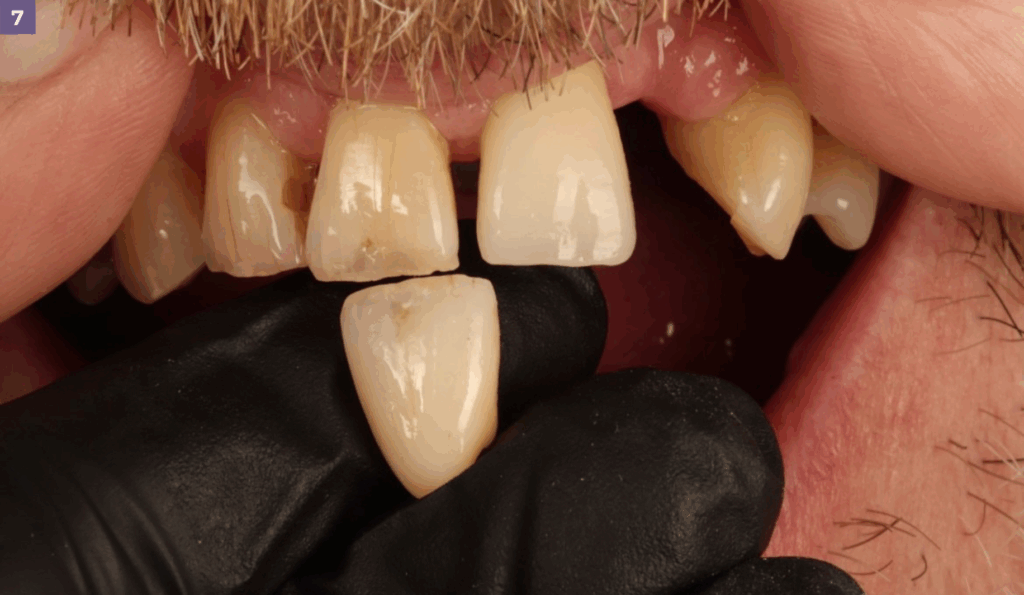
Figure 6: I used a range of photographs from different angles to characterise the teeth, but I used this one specifically to create the colour map, as I found it best captured all detail.
Figure 7: The natural translucencies seemed heavy with the open jaw, however the patient had an overbite so I refrained from adding too much greyness to the incisal edge so that it wouldn’t look over done when the patient smiled, without light passing through the teeth.
The patient also communicated that he did not want too much of the brown staining, which of course goes against the natural artistic flow of trying to match a single central perfectly. I added all of my colour on the first stain firing and then a very thin layer of glaze on a glaze firing to ensure the teeth didn’t appear too glossy and kept all of the added texture.
The patient came back for a final shade check, which I was nervous about to say the least, due to the challenges faced during this case and my strive for perfection. To my delight, the patient was very pleased and, although I wanted to add more warmth to the central crown, the patient felt confident it looked correct as it was (Figure 7).
Final product
Although there were challenges in this case, the final outcome matched exactly what the patient had requested, and he was very happy with it at the final shade check and fit appointment. The clinician also expressed how satisfied he was with the final fit and the patient’s natural appearance, which was a big concern for the patient from the start (Figures 8 to 10).
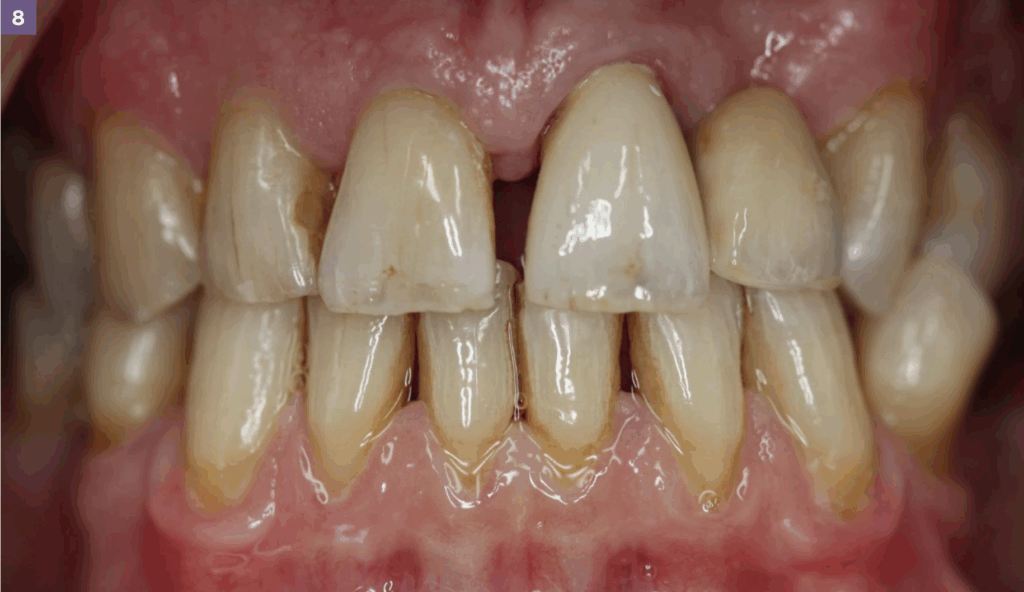
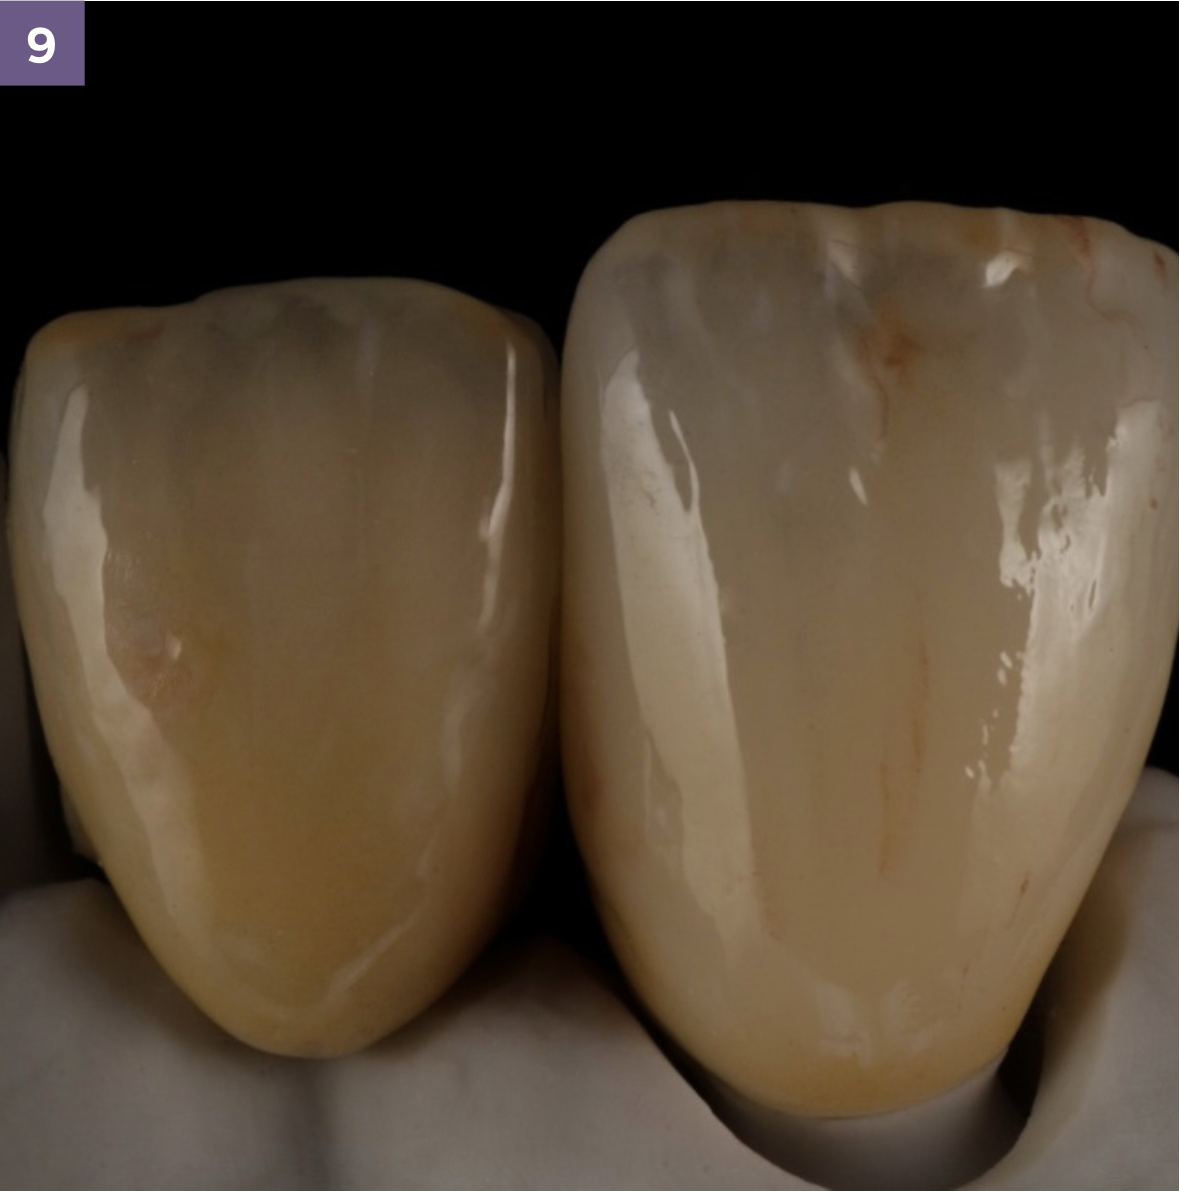
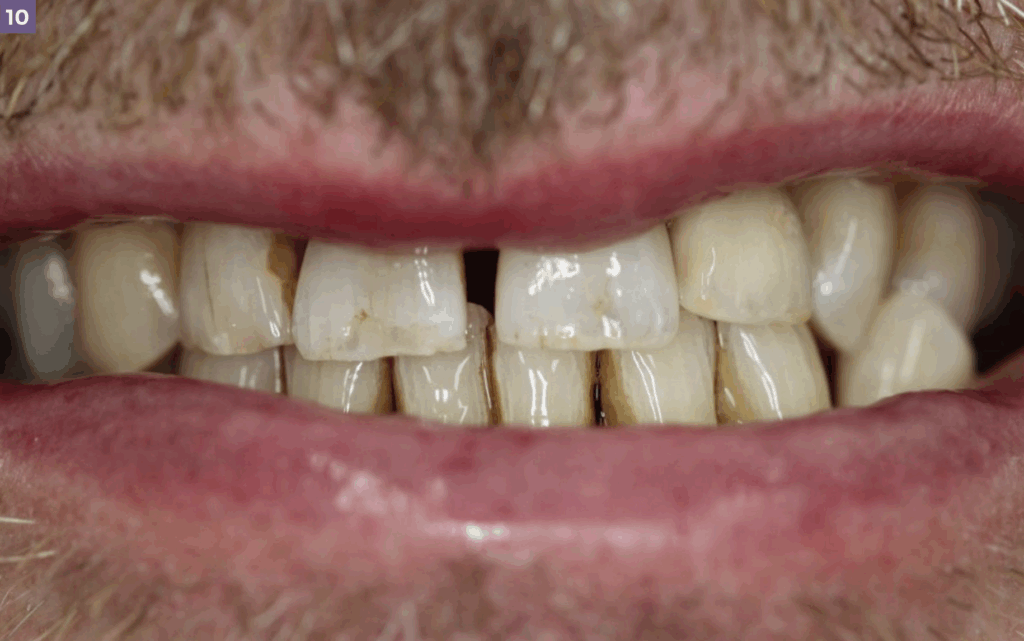
Figures 8 to 10: The final restorations on the working model and in situ with natural bite and relaxed lips.
Reflections and acknowledgements
This was a great case to put my technical, layering and staining skills to use and, although I was nervous about the final outcome, I was relieved when both the patient and clinician were happy. This case reminded me of the importance of communicating with the patient thoroughly before starting the case, and how crucial shade-taking appointments can be.
As an apprentice, it can be difficult to find confidence within these complex cases, and there are many times when doubt over your own skills and knowledge can creep in. This case has encouraged me to continue researching different techniques and ways of working when it comes to porcelains, as well as practising and expanding my skill set surrounding shade selections and photography. Now, in future cases, I will have more confidence to produce detailed anterior restorations and explore new techniques.
The hardest part about starting these teeth, was knowing that the patient required the teeth to be slightly lighter than the natural dentition and trying to find that balance.
Of course, this shows that students absolutely have the ability to produce complex aesthetic cases when given the chance and support within the lab by other technicians. This case would not have been possible without the patient’s effort and the patience shown during each appointment, as well as the wonderful clinical work by Dr Steve Pearce at Sawley Dental in Nottingham.
I could not have completed this case without my wonderful team leader and head ceramist at the lab, Jenna Ellis. Without her expert knowledge and eagerness to support me during this case, I would have been a little lost. I also owe much credit to the fabulous technicians and managers that I work with every single day at GoDigital Dental Laboratory who pride themselves in giving apprentices the same opportunities as qualified technicians and understand the importance of doing so for the future of dentistry.
Leah Potter
Apprentice dental technician, Go Digital Dental
Connect with Leah: @l_e_a_h_r
Click to see the published article: