

Read the dental shade taking guide by GoDigital Dental Lab for the best results
Getting the shade of a patient’s teeth right is a small step that makes a big difference. When everyone follows the same approach, communication is better, there are fewer needs for adjustments, and the final restoration looks more natural.
What you will need
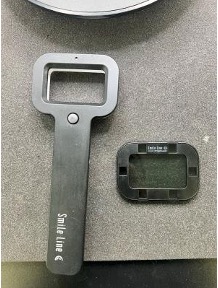
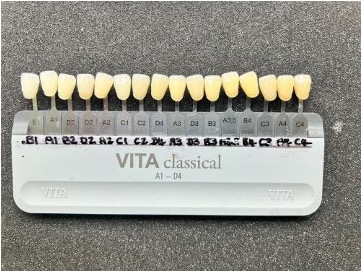
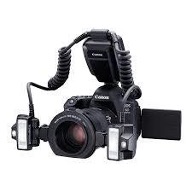
Before you can actually take a patient’s shade, make sure you have the following:
- Shade guides, with shades in the A-D range, plus bleach shades
- Camera, either a DSLR or a good-quality mobile phone camera
- Daylight, or means to colour correct lighting
- Shade map or card
- Polarising filter
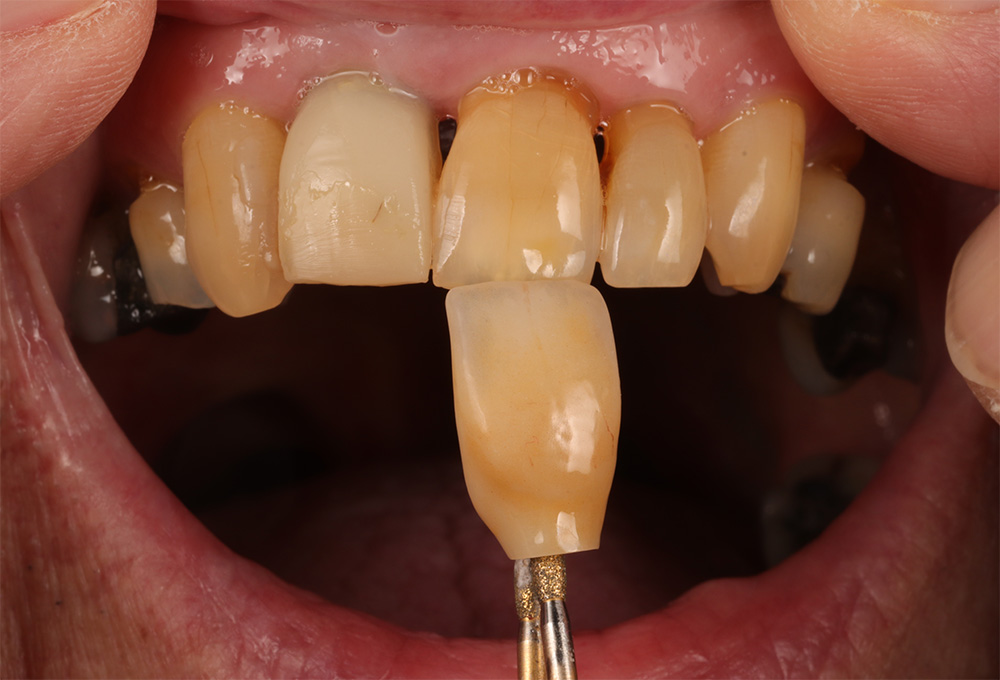
- Stump shade guide
- Skin tone alcohol-based pens
Ensuring correct conditions and information
We will need a bit of information from you and your patient as part of the process.
It is important for us to know if the patient has recently had any bleaching, as well as information about any planned future treatment, as these can influence final shade and colour choice, as well as timing.
Clear guidance on which tooth is being used for the colour match is essential, along with any instructions for copying shape, surface texture, or natural character, so we can achieve a more realistic restoration that matches your patient’s expectations.
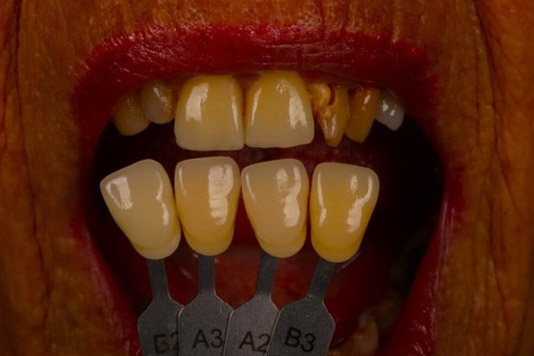
The conditions you shade take in also matter. If your client is wearing bright lipstick, it’s best to kindly ask them to remove it, and any strong colours need to be neutralised so they do not influence the perception of the tooth shade.
The ideal time for shade taking is between 10am and 2pm, as this is when the outside natural light is most stable. Where possible, use lighting around 5500 Kelvin to mimic neutral daylight conditions and reduce colour distortion.
It is also helpful to get a second opinion from another team member during the process, as a fresh pair of eyes can improve accuracy and consistency.
Taking the shade
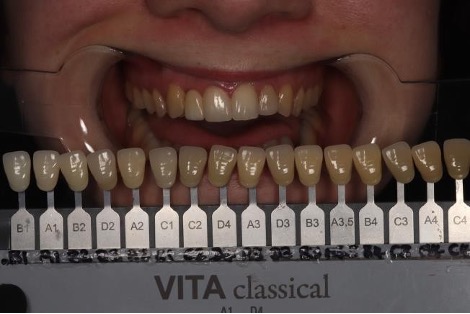
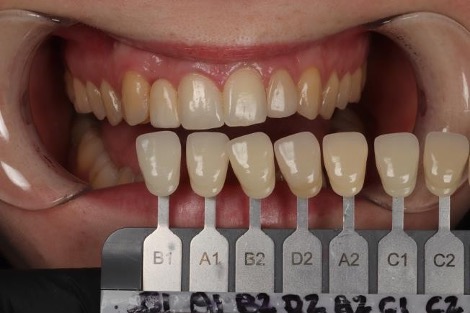
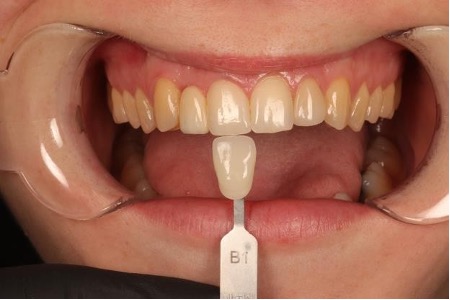
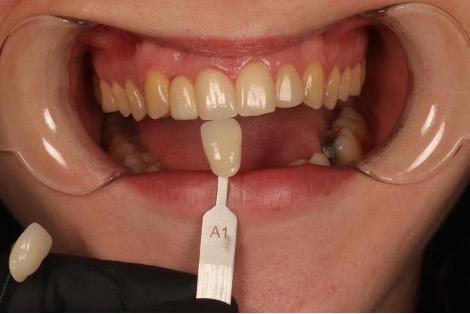
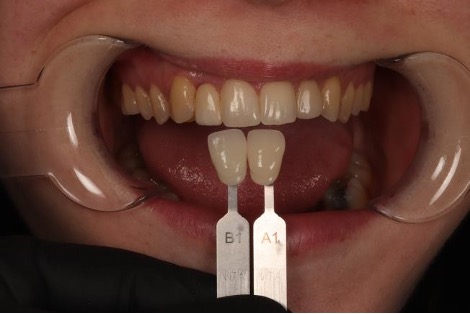
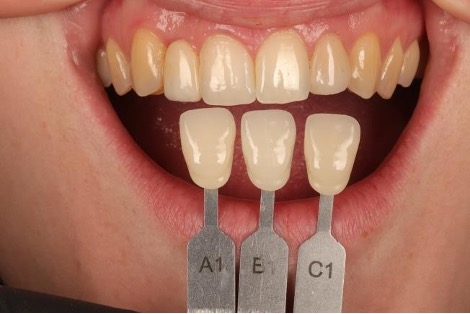
For the best shade match, we recommend using a shade guide arranged by value, from lightest to darkest, as the human eye is far more sensitive to differences in value than it is to differences in hue or chroma. This means an accurate value match will help a restoration blend seamlessly within the mouth, even if there are slight variations in colour.
Because value is less affected by changes in lighting conditions than hue, start by identifying the closest match before you move on to look at other characteristics. Starting by matching value also helps you quickly identify and eliminate unsuitable shades and narrow down your options more efficiently.
Once the correct value has been selected, you can then refine the shade further by assessing hue, the basic colour tone, chroma, and the intensity or saturation of that colour. Following this process helps ensure a more predictable result and provides us with the information we need to create restorations that closely replicate the appearance of the natural dentition.
Ideal photos
Good photographs are one of the most valuable tools we have when matching a shade, as they show us shape, texture, translucency, and how the teeth interact with light, as well as tooth colour. Providing a range of views gives us a clear understanding of the case.
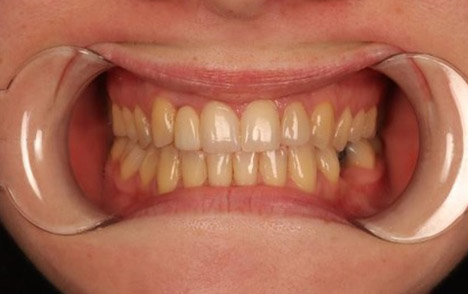
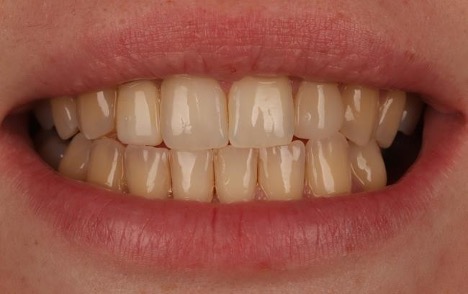
The ideal photo set includes:
- An open retracted view with the eyes and nose level
- A close-up retracted view to show shade and surface detail
- A natural smile with the teeth together
- An edge-to-edge view to highlight incisal translucency and halo effects
- Side view photographs to show tooth angles, contours, texture, and light reflection
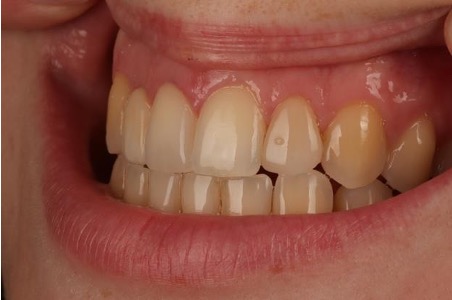
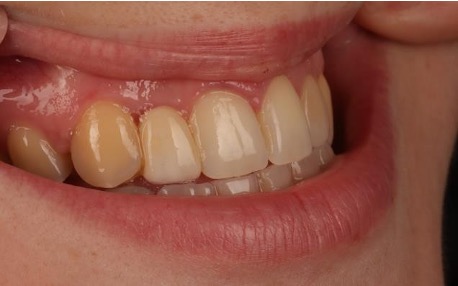
Try to avoid overexposing the image, as this can make the teeth appear lighter and reduce certain details we need to see.
If you are using a DSLR camera and struggling to balance the lighting, using the RAW format for images can be helpful, as these files retain more information and allow for more flexibility when it comes to adjusting exposure and white balance, helping preserve accurate shade details.
Polarised photos can also be helpful, as they eliminate surface reflection from the teeth and soft tissues, allowing you to see details within the tooth’s structure.
Avoiding missing or incorrect information
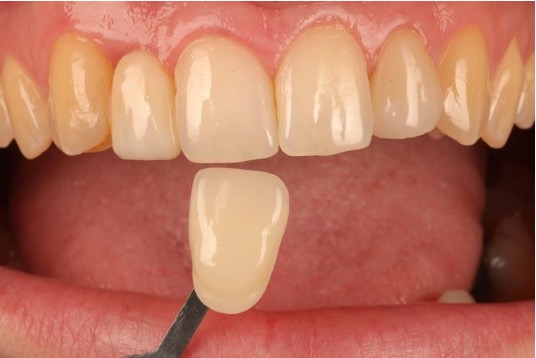
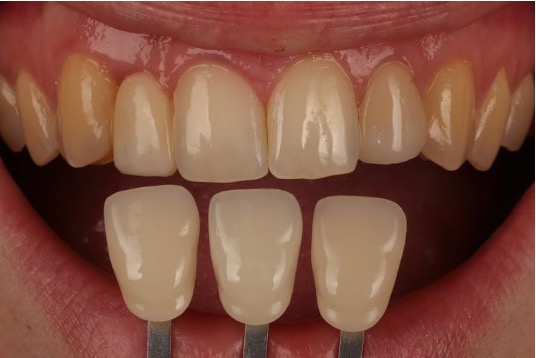
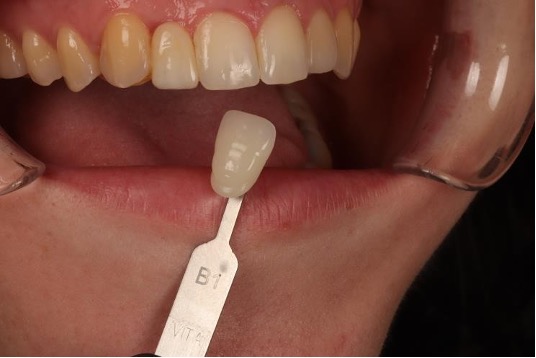
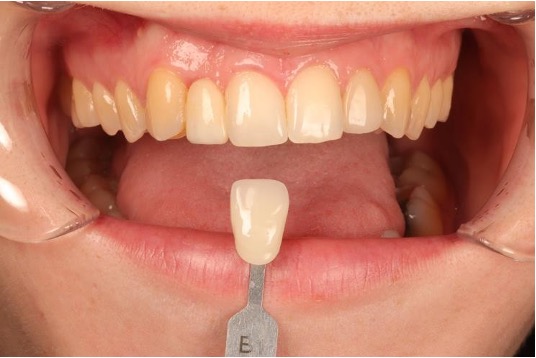
Even slight inaccuracies can have a big effect on shade communication. One of the most common mistakes we see in shade photographs is the shade tab being held at a different angle or position relative to the tooth. While this might seem like a small detail, the right alignment makes achieving an accurate shade match that much easier.
When the shade tab and tooth are positioned on the same plane, both surfaces receive light from the same direction, which allows us to compare the tooth and shade tab as accurately as possible under the same lighting conditions.
Correct alignment also helps reduce the effects of shadows, reflections, and glare, all of which are things that can easily distort the appearance of a shade and make a tooth look lighter, darker, or more saturated than it really is.
Keeping the tooth and shade on the same plane makes it easier for us to make a clear and consistent comparison and gives us the best chance of achieving a natural-looking final restoration.
If the shade tab is held at an angle, positioned too far forward or backwards, or tilted away from the tooth, it will reflect light differently, which can cause the shade tab to look darker or take on a different colour tone, even when it is the right shade.
Taking a moment to check alignment before taking a photograph can prevent unnecessary confusion and help us produce a more predictable restoration.
Checking and retaking
Before moving on to the next step, it’s always worth having a quick look through your photographs to make sure they show the information clearly. Ideally, the camera should be positioned at a 90-degree angle to the tooth surface, as this gives the most accurate representation of colour, value, and detail.
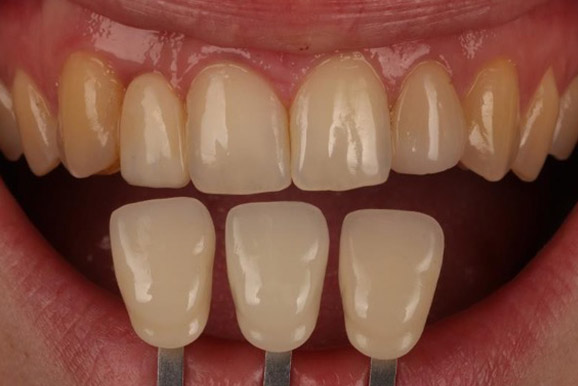
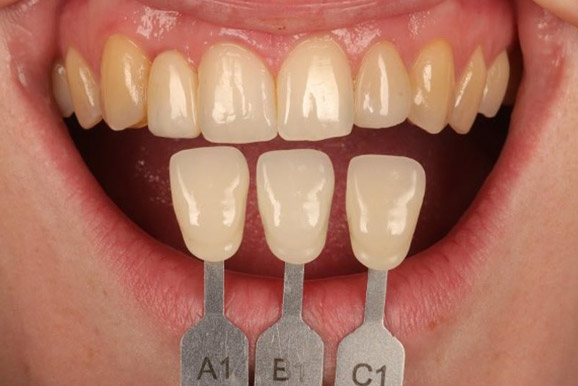
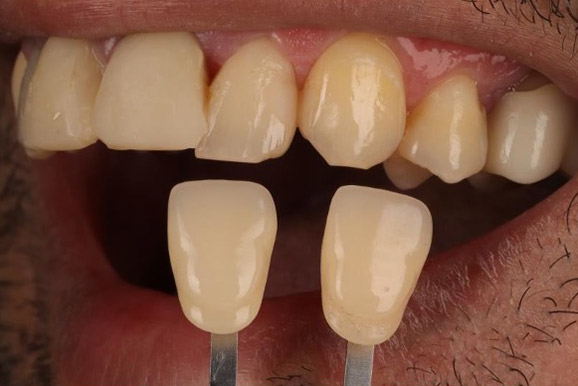
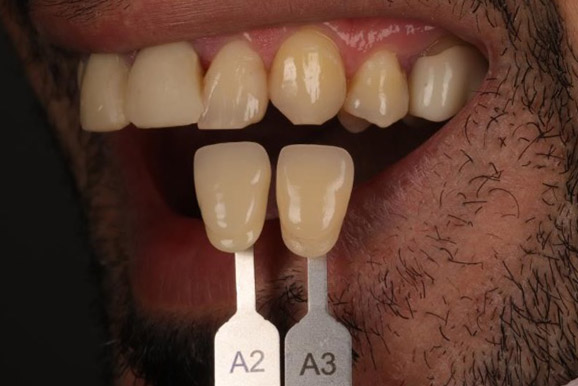
If an image looks unclear or does not accurately represent what you can see clinically, it’s usually best to retake it. Spending a few extra minutes checking your photos can give us the best possible information to work from and reduce the need to take them again and potentially hold up the process.
Backing photos up with a shade map
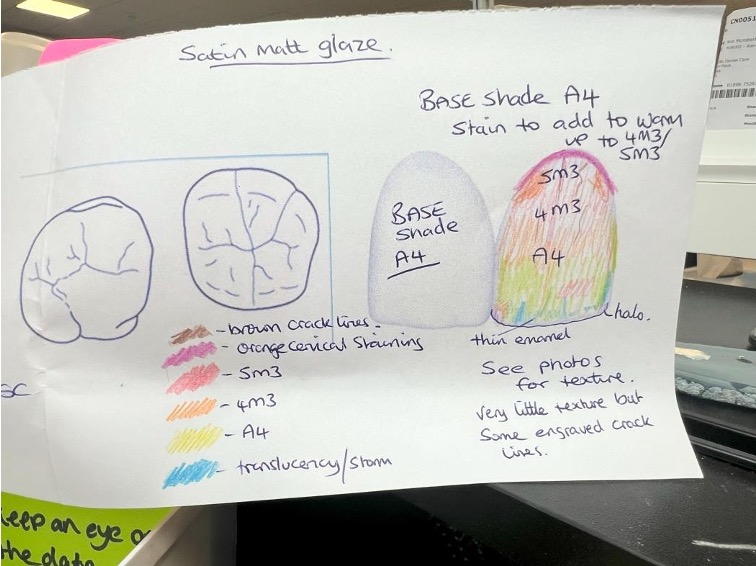
A shade map gives us a clearer picture of how colour changes across the tooth and helps us understand details that can be difficult to interpret from photos alone.
While photographs provide a useful reference, they cannot always capture exactly what you see clinically, and your assessment of the value and overall shade is incredibly valuable. Since you will have seen the patient in person, we encourage you to share your personal opinion on the closest shade match.
When photographs are supported by a shade map and your shade selection, we can work with much greater confidence.
Other suggestions to help shade taking
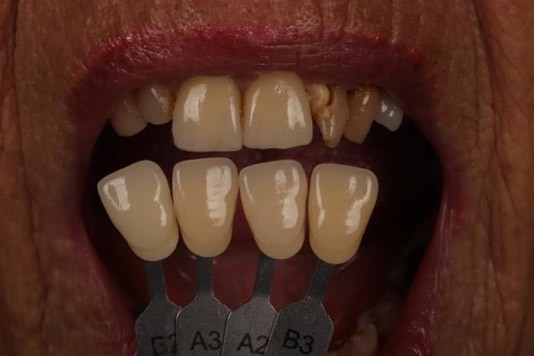
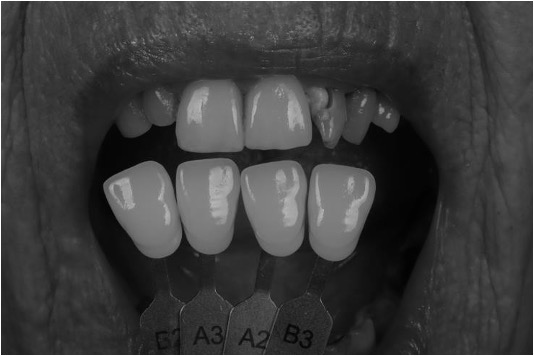
If you do not have a polarising filter, there are still a few simple ways to help improve shade communication. One of the most useful is taking a black and white photo by switching your camera to monochrome. Removing colour allows us to focus on value, which is often the most important part of a natural-looking match.
Monochrome images also reduce the effect of reflections and glare, especially on shiny tooth surfaces, where colour can be misleading. They can make it easier to see texture and subtle changes in lightness.
It can also help to include a slightly more saturated image alongside your standard photos. This can make small differences in hue and chroma easier to pick up, and highlight depth, character, and translucency.

Dental Lab Services
dentist file upload
Use our portal to quickly and securely send your patient files to our dental lab team.

Keep up to date with our dental lab team
Flexible solutions for every shade
Why choose GoDigital Dental for shade taking?
At GoDigital Dental, we make shade taking simple, fast, and accurate. Our advanced technology helps you match tooth colours perfectly every single time. By using digital tools and intelligent software, we reduce human error and increase efficiency. No more guesswork or re-dos, just reliable results your patients will love. Our approach helps improve clinical outcomes, enhances communication with labs, and supports greater consistency across dental practices, leading to better overall care for patients.
Enhanced patient satisfaction
Achieving the perfect shade match is crucial for patient satisfaction, especially for restorations that will be placed in a visible area of the mouth. Whether you’re sending us implant cases, crowns & bridges, or large cosmetic veneer cases, by outsourcing to GoDigital Dental, you can ensure your patients receive restorations that look natural and blend seamlessly with their existing teeth, improving their overall experience as your patient.
Our promise of quality
At GoDigital Dental, quality is everything. Our shade taking service is one of the ways we help you give your patients the best care. By using our lab for shade matching, you can be sure that your restorations will match each patient’s teeth closely for the most natural, aesthetically pleasing result. We look forward to helping you create beautiful, lifelike restorations with our accurate shade taking service.
Where comfort meets craftsmanship
Prefer us to take care of the shade match?
While this guide is designed to help you achieve accurate shade selection in practice, we know that some cases benefit from a dedicated shade appointment.
If you would rather leave the shade taking to us, our experienced team at the GoDigital Dental lab in Nottingham is here to help. Using specialist equipment, natural lighting techniques and years of hands-on experience, we will ensure your patient’s restoration is matched as accurately as possible for a seamless, natural-looking result.
Our shade taking service is ideal for complex cases, highly aesthetic restorations, or simply when you want complete confidence in the final outcome. By letting us manage the shade match, you can focus on treating your patient while we take care of the finer details.
Get in touch to arrange a convenient shade appointment at our Nottingham laboratory.
Shade taking dental experts
How to book an appointment
You can either pass on our details to your patient and ask them to give us a call, which we find is the more convenient way for patients. Alternatively, with their permission, you can pass on your patients’ details to us, and we will contact them directly.
Either way, always ensure you have discussed this with your patient and let us know that you wish for a patient to attend our lab for a shade taking appointment.
Where to find us
Our dental lab is based in Nottingham, just a short 4-minute drive from M1 Junction 26, and has free parking available, making it convenient for you to visit us by car. We’re a short walk away from the Phoenix Park tram stop, and there are also great bus links from Nottingham City Centre.
Whether you are a local dentist or based further away, we offer you and your patients a reliable, professional service that fits both of your busy schedules.
Customer Reviews

hello@godigital-dental.com
GoDigital Dental | Dental Lab
6 Millennium Way West
Nottingham
NG8 6AS